A minimal Verifiable Service
In this tutorial we will learn how to create our very first own Verifiable Service using VS Agent that is able to interact with users using Hologram App, capable of receiving text messages and transform it to Yoda-speak. Maybe not so useful, but fun to learn the basics of VS Agent configuration and API!
Requisites
To complete this tutorial, we will need any Linux/MacOS-based computer with:
- Docker
- NodeJS 18 or newer
Get VS Agent
We can run it locally or by using Docker, pulling the image from DockerHub:
docker pull io2060/vs-agent:dev
Running VS Agent is easy, but we will first need to understand how to set it up in order to make it usable.
Making our VS accessible
VS Agent has two main interfaces: a public one (meant to be accessible by Hologram users and other Verifiable Services) and an administrative one (meant to be accessed by a controller, which is a backend on our side that will provide the main logic of our Verifiable Service), which we might want to keep private.
To let Hologram reach our VS, the first thing we will need is a public host where we can expose our VS Agent public API.
For testing purposes, we can use ngrok or any other tool that allows exposing local servers to the internet. By default, public API uses 3001 port, so for instance with ngrok CLI tool we can do:
ngrok http 3001
This will create a tunnel with a temporary HTTP address.
Once we get our public address, we will need to provide our VS Agent instance two environment variables:
- PUBLIC_API_BASE_URL: the HTTP URL (including protocol, host and port) where public API is accessible. For instance,
https://didcomm.myhost.comorhttps://9508-200-11-132-214.ngrok-free.app - AGENT_ENDPOINTS: comma-separated base URLs for DIDComm communication (e.g. to exchange messages with Hologram App). VS Agent currently support both WebSockets (wss) and HTTP (http), being the first one recommended for minimum latency. So, following the examples, we can set it to
wss://didcomm.myhost.comorwss://9508-200-11-132-214.ngrok-free.app
This is enough for we to get a basic VS Agent app and running. So let's run it:
docker run -p 3001:3001 -p 3000:3000 \
  -e PUBLIC_API_BASE_URL=https://myhost.ngrok-free.app \
  -e AGENT_ENDPOINTS=wss://myhost.ngrok-free.app \
  --name vs-agent io2060/vs-agent:dev
Note that we are exposing both ports 3000 and 3001, the default ports for VS Agent's admin and public API respectively.
If everything goes OK, we'll see in our console:
VS Agent {version} running in port 3001. Admin interface at port 3000
Connecting with Hologram
Now we have our VS Agent up and running, we can connect to it by opening in a web browser http://localhost:3001/invitation. This will redirect we to hologram.zone website with a QR code we can scan with Hologram.
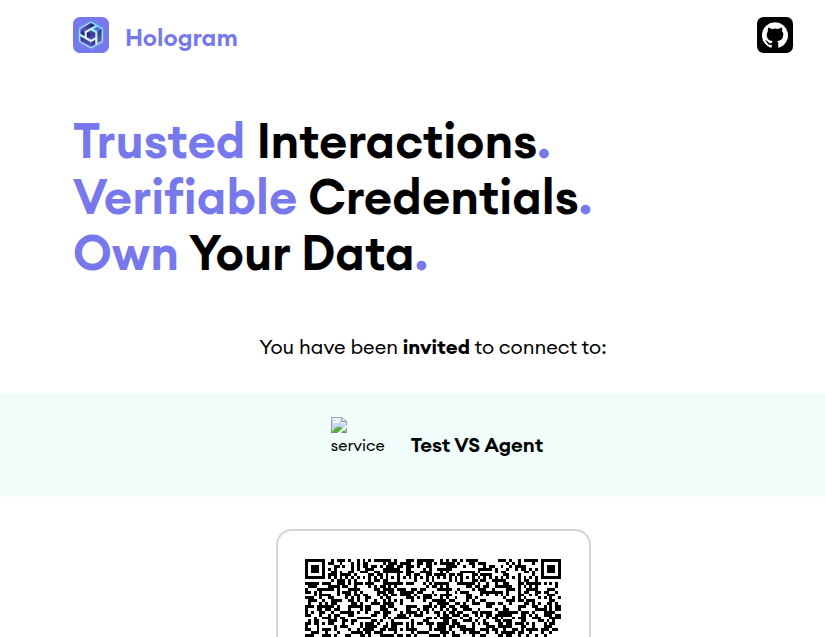
You may notice that there is a "Test VS Agent" on top of the QR code. We can certainly update it with our own label and icon by passing two more enviroment variables to our VS Agent:
- AGENT_LABEL: string to be shown in invitations (only when the VS is not trusted, i.e. no Verifiable Trust info set on it, which is the case for our service at the moment). E.g.
My first Hologram VS - AGENT_INVITATION_IMAGE_URL: location of the icon we want to show in our invitation (also used only in non-trusted services). E.g.
https://hologram.zone/images/ico-hologram.png
Let's run it again and see what happens:
docker run -p 3001:3001 -p 3000:3000 \
  -e PUBLIC_API_BASE_URL=https://myhost.ngrok-free.app \
  -e AGENT_ENDPOINTS=wss://myhost.ngrok-free.app \
  -e AGENT_LABEL="My First Hologram VS" \
  -e AGENT_INVITATION_IMAGE_URL=https://hologram.zone/images/ico-hologram.png \
  --name io2060/vs-agent:dev
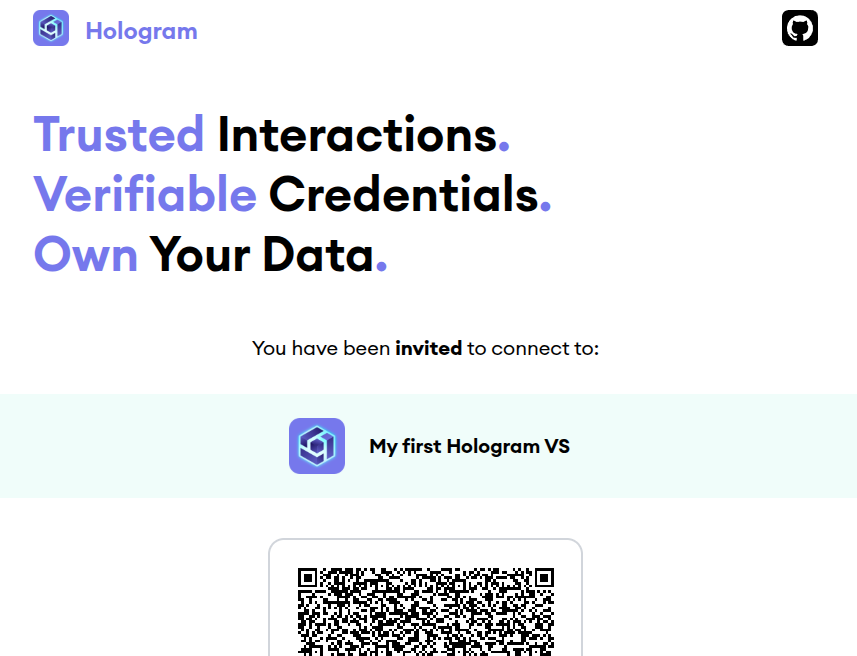
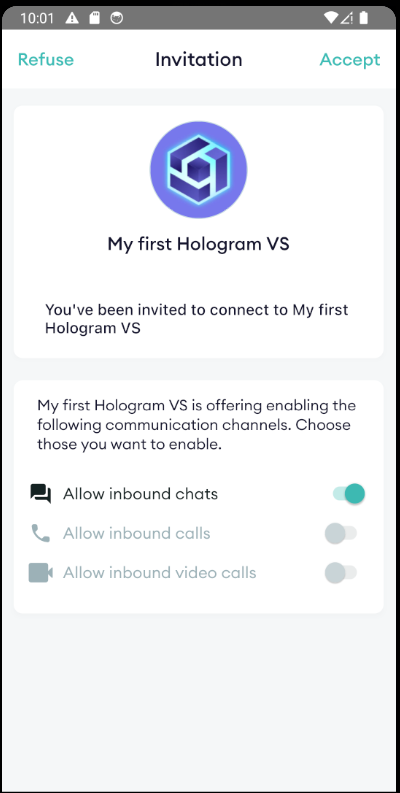
Much better now! And if we scan it with Hologram, we'll now see the invitation with the correct data and be able to accept it:
Sending a message
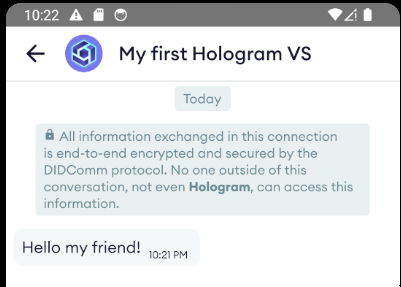
Allright: our user is connected to our VS through an end-to-end encrypted DIDComm connection. How can we interact with them? This is something we'll dive deeper in following tutorials, but let's see how we can easily identify them and send a text message, which is the simplest form of message we can send to Hologram.
For this purpose we will need to use two methods from VS Agent Admin API. To facilitate our work, we can open a web browser in http://localhost:3000/api, which will show us a convenient Swagger interface.
Identifying user's connection id
Each Hologram app instance connected to our VS Agent has a DIDComm connection. We are interested in knowing its id, so we can use it afterwards to send the message. So we can go and execute GET /v1/connections method. The response will be an array of a single element, since we've just set up our agent:
[
  {
    "id": "b5079338-b96e-4197-98db-ada67db10895",
    "createdAt": "2025-07-07T22:02:02.221Z",
    "updatedAt": "2025-07-07T22:02:04.364Z",
    "did": "did:peer:1zQmSzC7RsBTzRTvDXUtRdStz51TcKPRJzPkfsv4H8fBicek",
    "theirDid": "did:peer:1zQmbq8rufUjBT39DHKt3jbrQBN3ijbUcAE7po5Wu8VKBnGp",
    "theirLabel": "Hologram user",
    "state": "completed",
    "role": "responder",
    "threadId": "c814f6b6-f63b-4b45-9f67-1071c63a8616",
    "outOfBandId": "8914a518-95ca-487f-a99b-d21a47ee8f87"
  }
]
Now we know that user is identified by the id b5079338-b96e-4197-98db-ada67db10895.
Sending a text message
In the Swagger interface we can scroll to the POST /v1/message(http://localhost:3000/api#/message/MessageController_sendMessage) endpoint, which is the main entry point for any message we might want to send to our users.
Set the request body to the following content:
{
  "connectionId": "b5079338-b96e-4197-98db-ada67db10895",
  "type": "text",
  "content": "Hello my friend!"
}
Execute it, and see what happens in Hologram. If everything went right, we'll see a new text message in the chat screen.
Receiving text messages
VS Agent offers a WebHook-based events API where we can keep track of new connections and messages arriving from them. Here we will set up a dead-simple web server that implements message-received event.
Create our backend
For this, we'll use Express and TypeScript:
npm install express
npm install --save-dev @types/express typescript ts-node
The code for the listener is simply:
import express from 'express'

const app = express()
const port = 4001

app.use(express.json())

// POST /message-received
app.post('/message-received', async (req, res) => {
  console.log((`Message received from ${req.body.message.connectionId}: ${req.body.message.content}`))
  const yodaSpeak = (text: string): string => text.split(' ').reverse().join(' ') + ', hmmm.'

  // Send a yoda-speak text message to the same connection
  const msg = { type: 'text', connectionId: req.body.message.connectionId, content: yodaSpeak(req.body.message.content) }
  async fetch('http://localhost:3000/v1/message', { method: 'POST', body: JSON.stringify(msg), headers: { 'Content-Type': 'application/json' } })

  res.end()
})

app.listen(port, () => {
  console.log(`Server listening at http://localhost:${port}`)
})

process.stdin.resume()
Save this file with the name message-logger.ts and execute it by doing in our console:
npx ts-node --compiler-options '{"module":"CommonJS"}' message-logger.ts
Register it on VS Agent
To make VS Agent aware of our backend, we simply need to set EVENTS_BASE_URL environment variable to the URL where our backend is reachable. Since we are running VS Agent with Docker, make sure to use our computer's IP address so it can properly reach it. Now we can run our VS Agent again:
docker run -p 3001:3001 -p 3000:3000 \
  -e EVENTS_BASE_URL=http://our-local-ip:4001 \
  -e PUBLIC_API_BASE_URL=https://myhost.ngrok-free.app \
  -e AGENT_ENDPOINTS=wss://myhost.ngrok-free.app \
  -e AGENT_LABEL="My First Hologram VS" \
  -e AGENT_INVITATION_IMAGE_URL=https://hologram.zone/images/ico-hologram.png \
  --name vs-agent io2060/vs-agent:dev
Receive a message from Hologram
Now, in Hologram we can connect to the service (opening in a web browser http://localhost:3001/invitation, like we did in previous steps) and send a message.
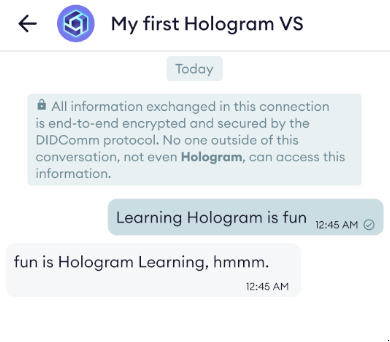
We'll see that the chatbot we've just created will automatically echo in a yogish-manner.
Summary
In this guide we discovered how to easily set up and create a minimal chatbot running locally in a computer capable of establishing a secure, end to end connection with Hologram app and receiving and send back text messages to it.
For this purpose, we used very basic tools, such as VS Agent's embedded Swagger API web interface. In the following examples, besides the creation of more meaningful Verifiable Services, we'll introduce some libraries that will make easier yo use VS Agent Admin API from NodeJS applications.